Getting started Install Graphileon AWS Edition
Thursday, December 3, 2020 2:07 PMSetting up Graphileon on AWS
Graphileon on AWS is distributed as an Amazone Machine Image (AMI), that allows you to spin up a virtual machine in your own AWS environment. We designed it in a way that Graphileon runs on a separate machine, so it does not interfere with the machines on which your graph databases are running.
Setting up Graphileon on AWS and connecting it to your graph database(s) is a straightforward process that can be completed in under ten minutes. Below you find the shortest path to a fully operational Graphileon.
Requirements
Before setting up Graphileon, make sure that you have:
- At least one running instance of a graph database either on your local machine, your network or in the cloud with the relevant credentials (url, protocol, port, username and password). The graph database that will contain the Graphileon functions needs to be read-enabled.
- Access to an AWS account with the required permissions.
Graphileon can currently be used with the following graph databases for both application store and data stores (in alphabetical order):
- AnzoGraph: Build Your Solutions on a Fast, Scalable Database
- Datastax: Open-Source, Scale-Out, Cloud-Native NoSQL Database
- Memgraph: The Platform for Your Real‑Time Connected Data
- Neo4j: The Fastest Path To Graph Success
- ONgDB: Open Native Graph DB
- RedisGraph: A graph database module for Redis
We refer to the respective vendor-specific instructions for the minimum requirements and installation procedures of the different graph database engines.
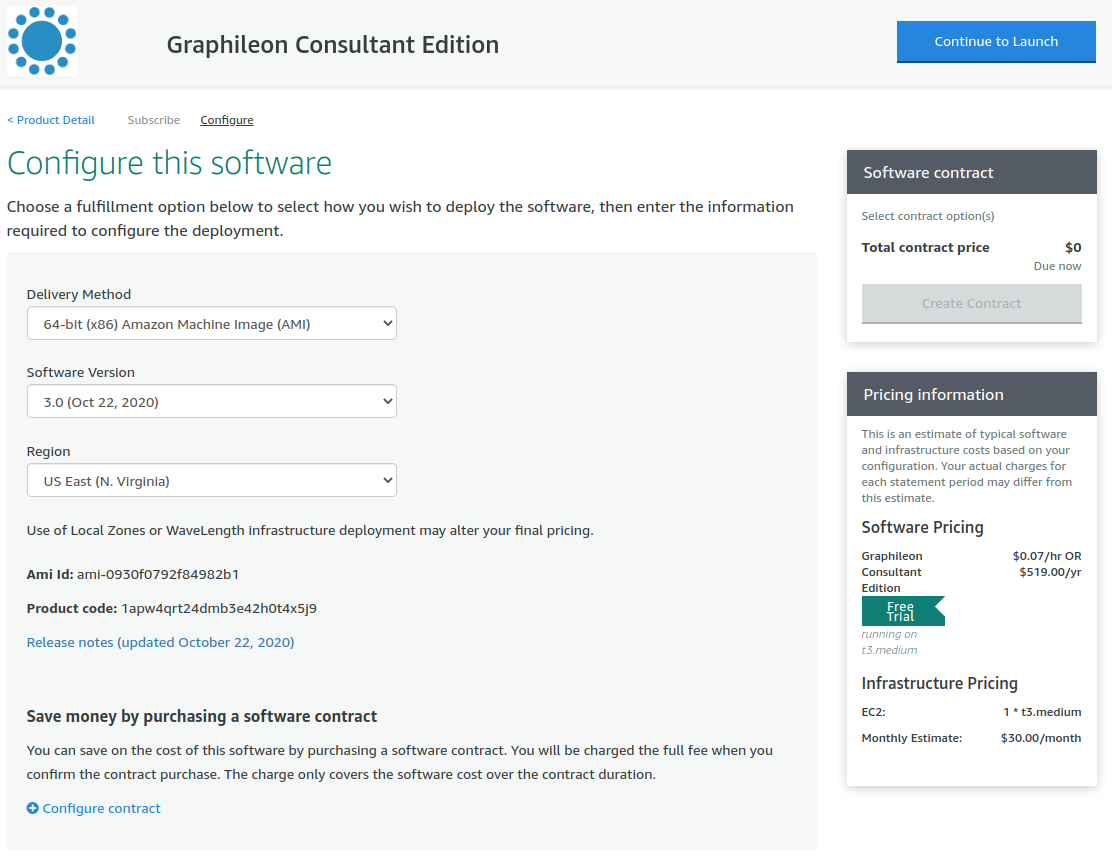
Finding the edition that meets your needs
-
Visit Graphileon AWS Editions and find out which edition meets your needs.
-
Subscribe to Graphileon using AWS Marketplace.
- Graphileon Personal Edition
- Graphileon Consultant Edition
- Graphileon Consultant Edition - yFiles
- Graphileon Team Edition
- Graphileon Team Edition - yFiles
- Graphileon Company Edition
- Graphileon Company Edition - yFiles
- Graphileon Development Edition
- Graphileon Development Edition - yFiles
- Graphileon Enterprise Edition
- Graphileon Enterprise Edition - yFiles
Installation
Make sure that you selected the latest Software Version and your preferred Region. Then click the Continue to Launch button.
On the page entitled "Launch this Software" do as follows:
-
Read the Usage Instructions.
-
For Choose Action, select
Launch from website. -
For EC2 Instance Type, select
t3.medium. -
For VPC Settings and Subnet Settings, use the same settings as the ones that apply to your graph database on AWS. If your graph database does not run on AWS, select the default option.
-
For Security Group Settings, select
Create New Based On Seller Settings. This will assure that you have access to the port 3000 on which Graphileon will run. -
For Key Pair Settings, Choose an exisiting key pair or create a new one for your EC2 instance.
Click the Launch button. Your Graphileon instance will be up in seconds.
Navigate to EC2 Instances and find new Graphileon instance you created. Get your Public IPv4 address or Public IPv4 DNS
.
Access the application via your web browser at http:/[Public IP or DNS address]:3000
Settings
You will be forwarded to the settings page once the installation has finished. This page consists of three parts, (1) Data stores, (2) Users and (3) Licenses.
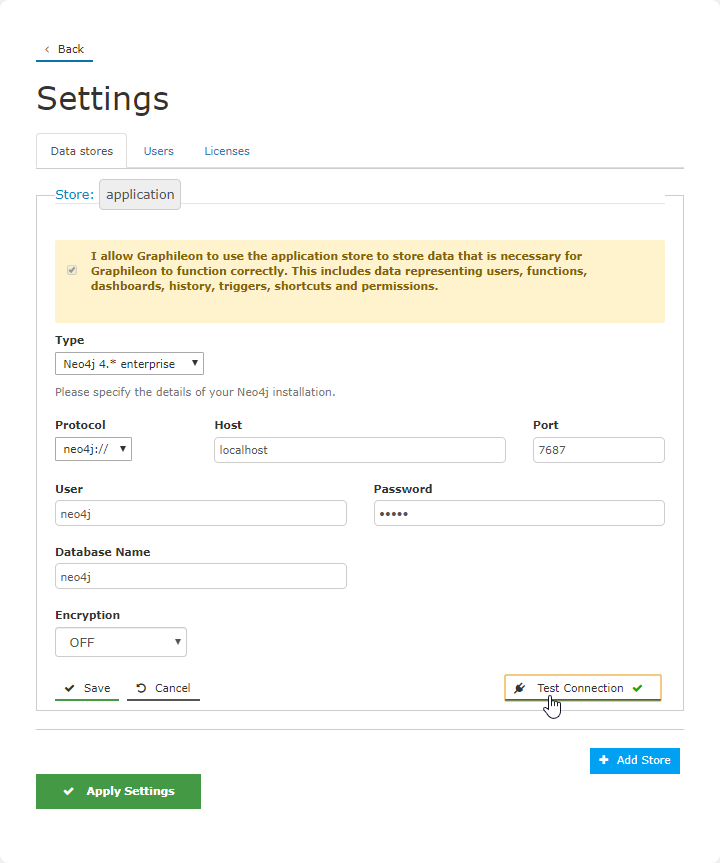
Data stores
Add at least one graph store. The first store will automatically be named application and is used to store the Graphileon users and configuration.
Select the Type first. This will set up the form with the relevant settings and defaults for the selected graph database.
- The "I allow Graphileon to use.. " check in the yellow box is required to allow Graphileon to write its basic configuration to the application store. Graphileon will not function when its basic configuration is not initially present in the application store.
- Only one application store can be connected at a given time.
To define a store connection you need to set:
- store type (AnzoGraph, Datstax, Memgraph, Neo4j (1) and ONgDB)
- Protocol (e.g. http, bolt, neo4j)
- Host (e.g. localhost for local stores or an URL or IP address)
- Port (e.g. 7687 as a default for Neo4j, Memgraph and ONgDB)
- User and Password, the user name and password for the data store
- Path and Graph Name (AnzoGraph specific)
- Local Data Center and Execution Profile Graph Name (DataStax specific)
- Database Name (Neo4j 4 enterprise)
- Encryption (Neo4j 4 and Aura)
- Certificate (Neo4j 4 and Aura)
(1) : Graphileon suppports Neo4j 3.5, 4.* community, 4.* enterprise and Aura
Test the connection and when successful, Save it and proceed to the Users page.
TLS Connections (Neo4j, OngDB, Memgraph)
Neo4j, OngDB and Memgraph store types allow and/or require the use of secured connections using TLS.
To enable this you need to set the Encryption field to ON and select a certificate verification method to match the way the database server is setup. The validation options are:
- Accept any certificate that can be verified against a custom Certificate Authority
- Accept any certificate that can be verified against the system store
- Accept any certificate provided by the server, regardless of Certificate Authority chain (not recommended in production).
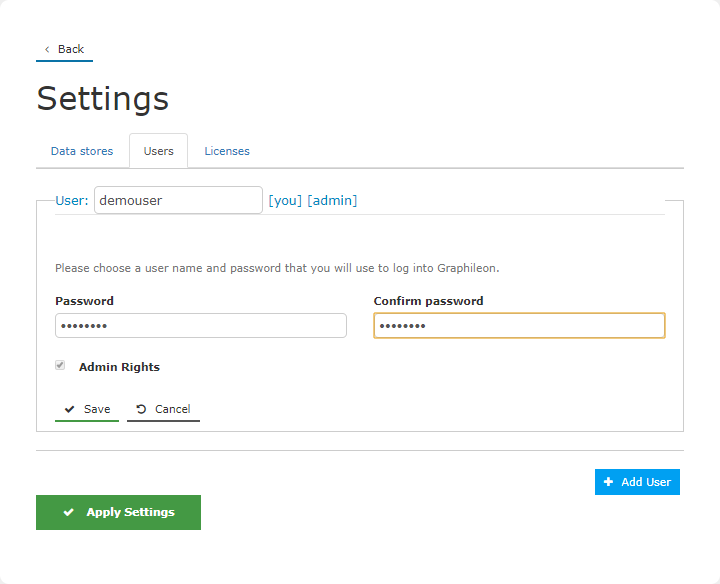
Users
Define at least one user with Admin Rights.
To define a user you need to set:
- User name (unique within your application store)
- Password and a confirmation of the password
- Admin rights which are required for the first user but optional for every next user. Admin rights provide access to the Settings dialog.
Now Save the user.
Licenses
Graphileon AWS Editions have its own licenses. Any changes that you make will be disregarded. The same applies for the yFiles license.
Apply Settings
Once the settings are saved, Apply settings. You will be forwarded to the Graphileon login screen. Here you should login with the credentials of the user you just created.
.. and that's it. From here you can start exploring, visualizing and managing your data and build graph applications on top of it.
See our Quick Tour for a short introduction of the Graphileon functionality.
Using secondary drive for file save location
You may need to keep your Graphileon config file (config.json) and file uploads when upgrading/downgrading your Graphileon edition. In order to do this you can use additional data storage and attach it to your new instance.
-
Create Volume
- be sure it is in the same
Availability Zonewith your Graphileon Instance
- be sure it is in the same
-
Attach new volume to the Instance and take a note of your device name (such as
/dev/sdf) -
To make an instance store volume available on Linux
-
Connect to the instance using an SSH client.
-
Use the df -h command to view the volumes that are formatted and mounted.
-
Use the lsblk to view any volumes that were mapped at launch but not formatted and mounted.
-
To format and mount an instance store volume that was mapped only, do the following:
-
Create a file system on the device using the mkfs command.
[ec2-user ~]$ sudo mkfs -t xfs /dev/[new disk] -
Mount the device on the Graphileon persistent directory using the mount command.
[ec2-user ~]$ sudo mount /dev/[new disk] /home/ec2-user/graphileon/persistent -
Restart Graphileon
[ec2-user ~]$ ps -e | grep graphileon
[PID] ? 00:00:01 graphileon
[ec2-user ~]$ kill [PID}
-