For Dashboard Users NetworkView
Friday, March 15, 2019 10:25 PMNetworkView
The NetworkView is the main visualization of the Neo4j graph database. From here, you can interact with, explore and manage data.
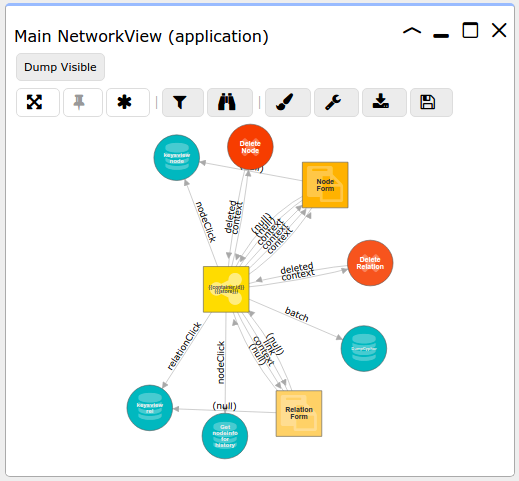
Select nodes and relations
Nodes and relations in a NetworkView are (un)-selected by clicking on them.
You can (un-)select multiple nodes by keeping the <Shift>-key pressed while clicking.
Controlled exploration
InterActor offers several ways to keep control over your exploration. You can of course double-click on a node and see your screen all of a sudden filled with many nodes, but in most cases it is more useful to orientate you exploration in a specific direction. Or to limit the number of nodes and relations that is displayed.
Filter the content of the NetworkView
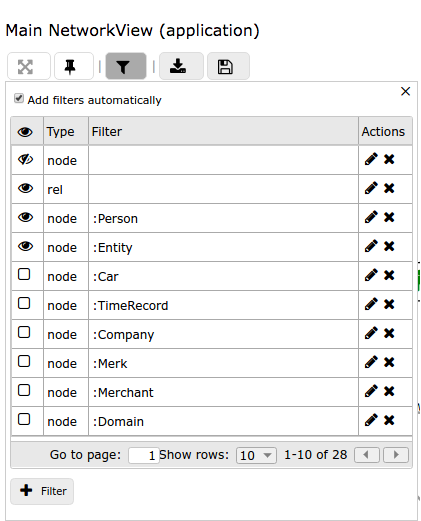
With the [Filter] button in the toolbar of the NetworkView, you can open a filter panel that can be used to limit the displayed nodes and relationships.
You can define filters for nodes and relationships with selectors.
Filters have 3 states:
- not active (empty square icon): filter is ignored
- hide (eye crossed icon): hides selected content
- show (eye icon): shows selected content
The show filters override hide filters.
This way you can remove items from view with hide filters or you can show only desired items(ex: hide all nodes and show only node:IA_Function nodes).
Add filters automatically will autogenerate filters for all nodes and relationships present in the NetworkView.
Load specific neighbours
The Neighbours panel in the sidebar-right contains the list of neighbours of the active node, grouped by the type of neighbour (based on node label) and relation type. The group header also display the number of neighbours in the group.
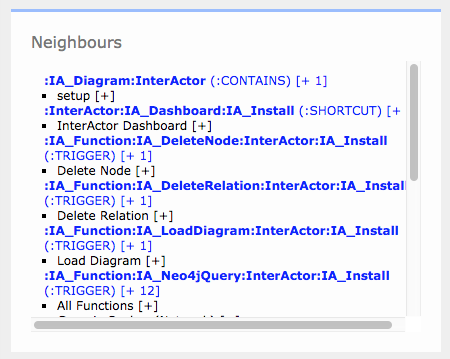
By clicking the [+ #] next to the group header or the [+ #] next to the neighbour name you can add them to the current NetworkView.
Filtered exploration (Enterprise Edition)
With the [Binoculars] button in the toolbar of the NetworkView, you can open a panel in which you can set which relation types will be loaded when you double click a node. The context is determined by the current set of visible nodes, and is updated automatically when the content of the NetworkView changes.
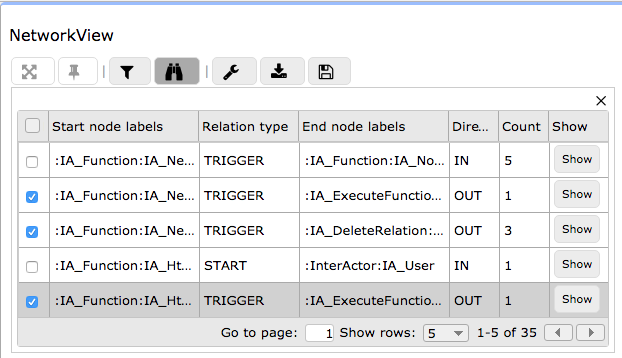
With the [Show] button, you can load all corresponding nodes.
Remove specific nodes from view
The context menu of the NetweorkView canvas (right-click on an empty space) has an option "Remove selected nodes from view".
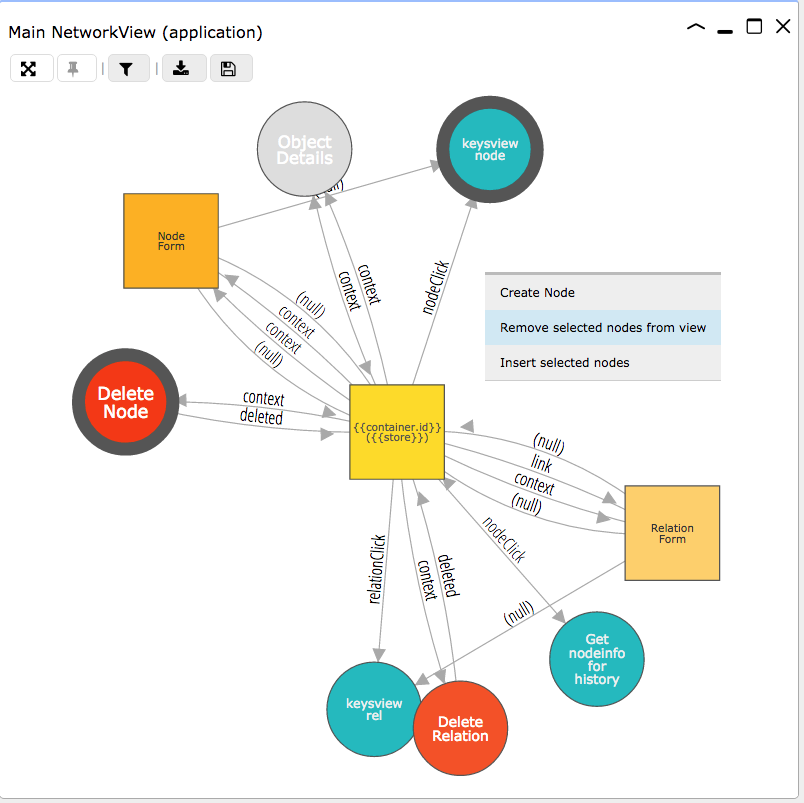
The nodes will disappear from view, but not from the graph store.
Use multiple NetworkViews
With multiple NetworkViews open, you can insert nodes from one NetworkView into the other. This does not replicate any data, but simply includes the node in the visualisation. This can be useful, for example, to connect a node from one query to a node from another query.
To insert a node from one NetworkView to another, select the node in the first NetworkView by clicking on it. Then, right-click the second NetworkView where you would like to use the node. From the context menu, select Insert selected nodes. The node will now appear in the second NetworkView (it has not disappeared from the first). Multiple nodes can be selected (holding shift while clicking) and inserted into another NetworkView.