For Dashboard Users Graphileon Dashboard
Monday, December 14, 2020 5:32 PMGraphileon Dashboard
YouTube: Getting started - part 2: A detailed explanation of the Graphileon PE user interface
This video gives an elaborate explanation of the Graphileon User Interface. It explains how to efficiently navigate your graphs, style your nodes and relations and manipulate your data in a visual way (22:44 min).

What's on the Dashboard?
After a succesful login, you will see the standard dashboard.
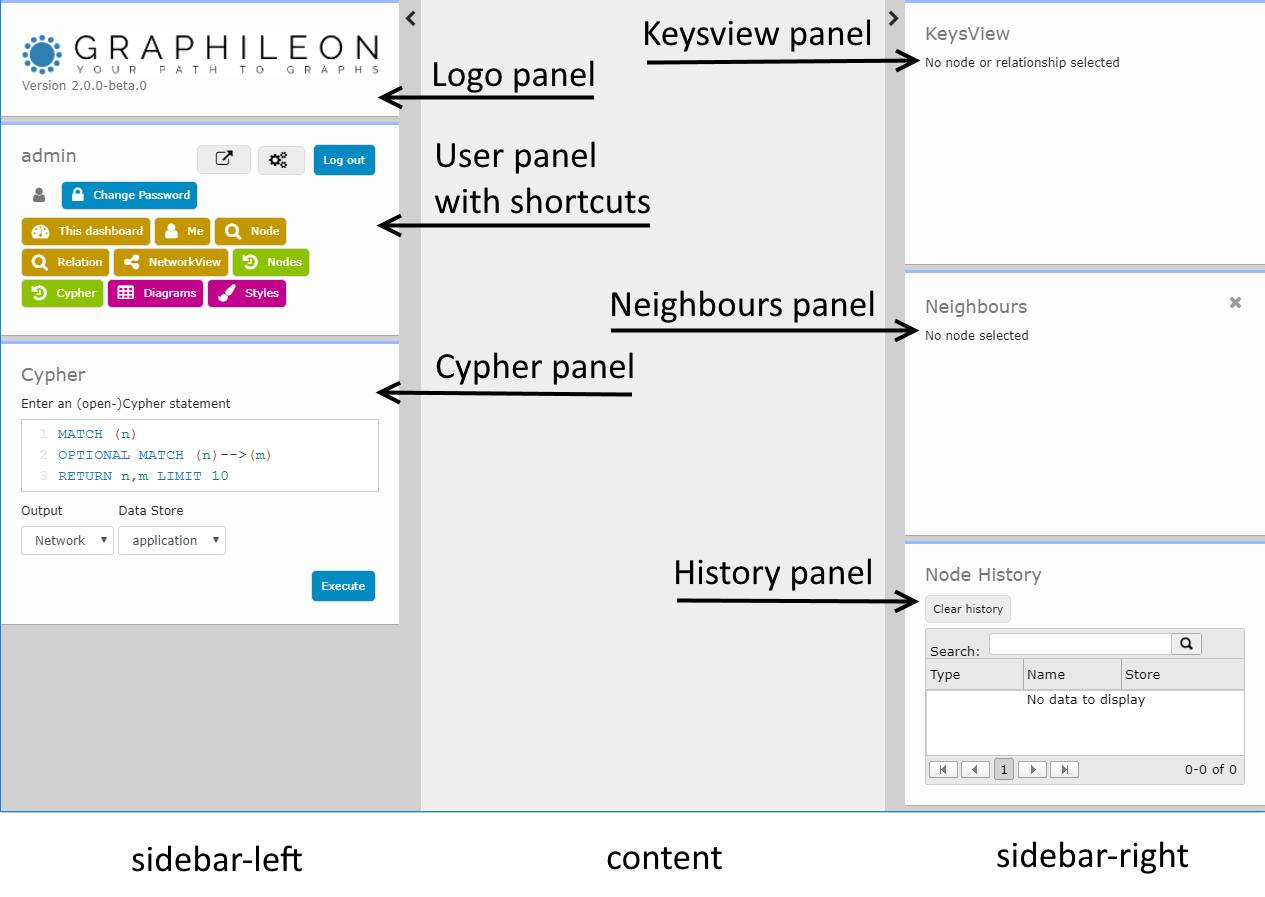
On the left side, in an area that is called sidebar-left you see:
- a Logo panel, that also displays the Graphileon version.
- a User panel, with your username, a break-out button to run Graphileon from the browser, a Settings button, accessible if you are an admin user, and a [Log off] button. Below these buttons you'll find a standard set of shortcuts that provide access to basic Graphileon functions.
- a Cypher panel, that allows you to execute openCypher statements against your graph store. A default Cypher statement is provided.
The central part, the content area, is empty at start. In this area most of the action will take place.
In the sidebar-right, you see:
- a KeysView panel in which property key-value pairs will of the active node or relation be displayed.
- a Neighbours panel that provides access to neighbours of the active node. It provides information on the type of relations, and allows you to browse the graph in a controlled way.
- a History panel that can display a Node or Cypher History. The Node History provides access to your trail of active nodes, the Cypher History provides access to your trail of Cypher statements executed in the Cypher panel.
Both the left and right panel can be hidden/revealed by clicking on the dark grey vertical bars with the < and > icons on it.
Now that you know the basic layout of Graphileon you can start exploring your graph data!
Cypher panel
For your first run, verify that our default Cypher statement
MATCH (n)
OPTIONAL MATCH (n)-->(m)
RETURN n,m LIMIT 10
is in the Cypher panel.
Decide against which Data Store you want to run the statement - in the example we use the default application store - and then click on the [Execute] button in the Cypher panel.
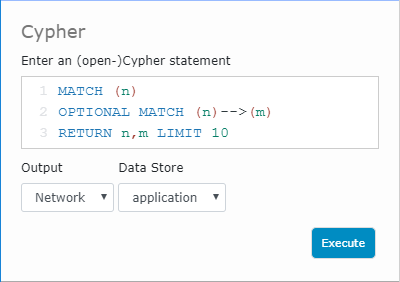
The statement is executed and the result is displayed in a NetworkView because Output is set to Network. You can also set Output to Grid to display the returned nodes, relations, their labels and properties in a nested table structure (try it!).
Any Cypher statement executed on the Cypher panel is added to the Cypher History trail that is shown in the History panel.
KeysView panel
When you click on a node or relation in a NetworkView or in the Node history panel, information about the selected item will appear in the KeysView panel.
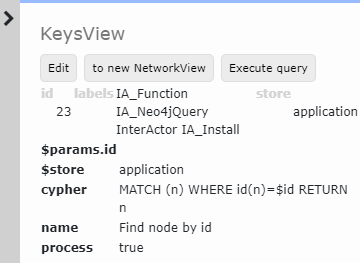
At the top of the panel you find at least two buttons that act directly on the selected item.
- Edit opens an edit form for the node or relation
- [to new NetworkView] displays the selected node or relation in a new NetworkView.
Additionally, and depending on the type of Function node you select, you might also see other buttons, e.g. [Execute query] for :IA_Neo4jQuery nodes or [Show diagram] for :IA_Diagram nodes.
Below the buttons you see some metadata, like the id, node labels or relation type, and the name of the graph store.
In the lower part of the KeysView panel you find the key-value pairs for the properties of the selected node or relation.
When you click on a node this also triggers updates of the Neighbours panel and Node History panel
Neighbours panel
The standard way of exploring a NetworkView is by double-clicking nodes. This results in all their neighbour nodes (at distance 1) and the connecting relations being added to the NetworkView. When you do this on a so-called dense node though, the result may not be particular useful. Controlled exploration, using the Neighbours panel, may be more appropriate.
The Neighbours panel lists the neighbouring nodes for the selected node by name. Neighbouring nodes are grouped in a tree structure by their direction (incoming, out-going or self-referencing), the combination of labels, the type of relation and the value of the 'type' property of the relation. The number of relevant nodes at each level of the tree is indicated between parentheses.
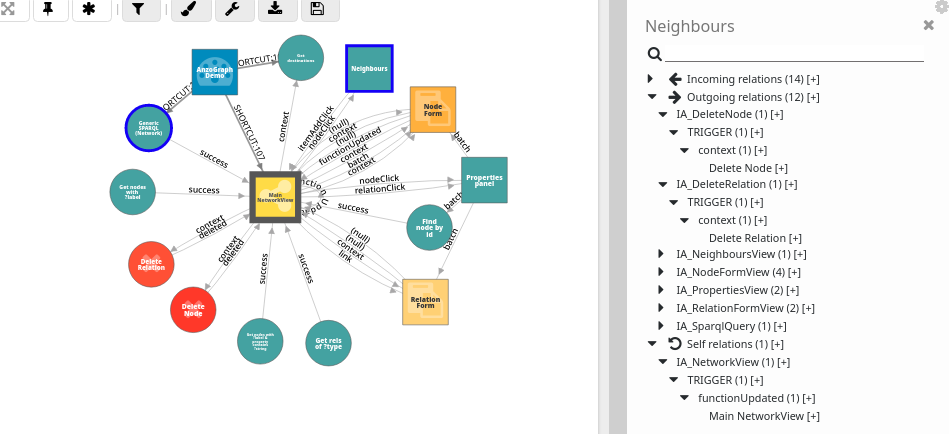
Clicking on the [+] link to the right of any item in the Neighbours panel displays all nodes at that level and below in the NetworkView. Hovering over an item at the lowest level of the Neighbours tree reveals a tooltip with the relation between the selected node and its selected neighbour. Clicking on the name of that neighbour in the tree makes it the active node in the Properties panel which results in the Neighbours panel showing the neighbours for that node.
History panel
The History panel doubles as a location for both the Cypher History and the Node History. It toggles automatically based on the user action -executing a Cypher statement switches to Cypher History, selecting a node will switch to Node History- but the user can also switch manually using the two green history buttons on the default User panel.
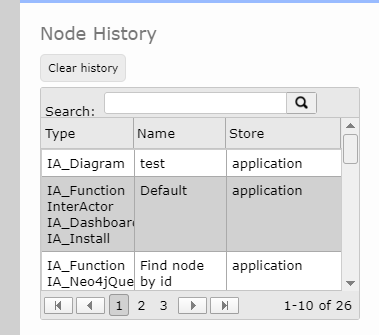
Node History
Whenever a node is clicked in a NetworkView, it will be added to the Node History trail. Selecting a node from the Node History on the History panel will not insert it in the NetworkView but will make it the active node in KeysView from where it can be retrieved from any NetworkView.
Cypher History
Selecting a Cypher History entry on the History panel will make it the active statement on the Cypher panel, including the Output and Data store information.
Saving and retrieving Diagrams
A Graphileon Diagram is a set of nodes in a frozen lay-out and not just an image.
You can save any view to a diagram by selecting the [Disk] button and providing a unique name for it.
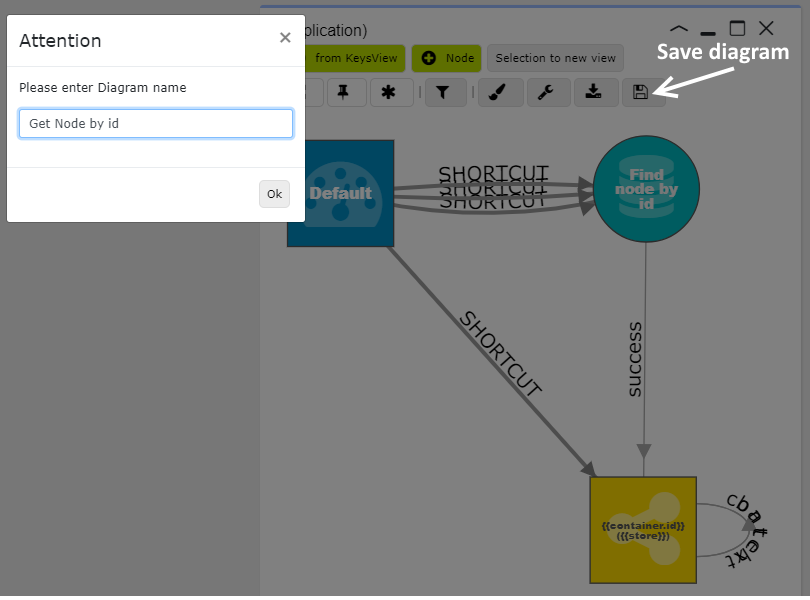
Diagrams are stored in your application store as nodes of type :IA_Diagram and are linked to your User.
To retrieve a diagram, click on the pink Diagrams button in the User panel and select a diagram. The selected diagram will be opened in a new NetworkView
User panel (Personal Edition)
The user panel has some standard functions and displays the buttons (shortcuts to mini-graph applications) that are connected to your dashboard.
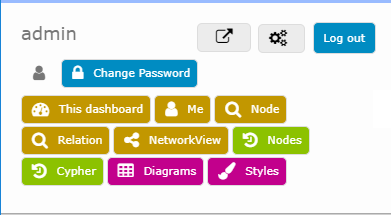
Standard functionality
- display of user name.
- break-out button to access the same Graphileon instance from your browser. This allows you to have multiple views on the same Graphileon instance simultaneously which is especially useful when building applications.
- Settings button as explained in the Setup section
- a [Log out] button.
- a [Change Password] function
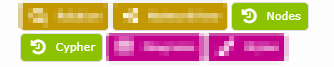
Default dashboard shortcuts
-
[This dashboard] places the Default
:IA_Dashboardnode on a NetworkView which allows you to view and modify the:SHORTCUTrelations to the different Graphileon defauly functionalities. -
[Me] places your
:IA_Usernode on a NetworkView for you to view and modify the functionality attached to it. - [Node] triggers the Node by ID functionality with which you can quickly retrieve a node when its ID is known
- [Relation], similar to Node by ID but retrieves the relation, including its start and end nodes, and places it in a NetworkView.
- [NetworkView] opens a new empty NetworkView.
- [Nodes] toggles Node History panel.
- [Cypher] toggles Cypher History panel.
- [Diagrams] opens list of stored Diagrams.
- [Styles] opens the node and relation Styling Dialog.